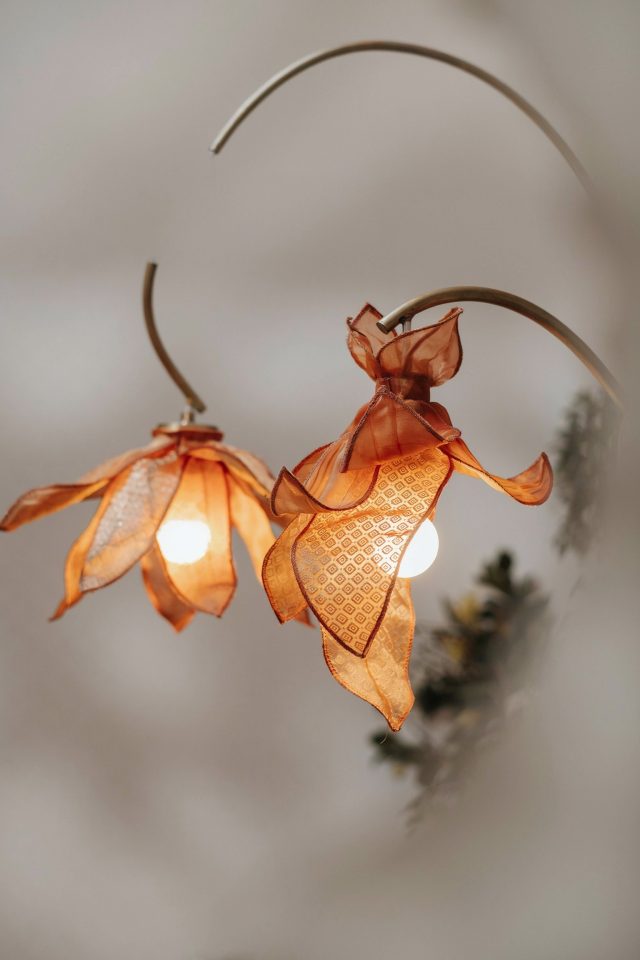
Why This DIY Lamp Works for Small Bathrooms
When I first thought about adding a hanging light to my tiny bathroom, I was overwhelmed by price tags and complicated wiring. That is when I stumbled on the idea of making my own with canvas fabric, BBQ skewers, and silicone glue. This DIY lamp tutorial for small bathroom decor turned out to be exactly what I needed: a budget friendly project that gives soft ambient light without taking up any floor space. The best part? You can finish it in an afternoon without any special skills. But here is the honest truth: I made several mistakes along the way. I want to walk you through the most common ones so you can skip the frustration and get straight to a beautiful homelighting solution for your own space.
Common Mistake #1: Picking the Wrong Fabric for Your DIY Bathroom Light
I almost ruined my first lamp because I grabbed a thick upholstery canvas thinking it would look sturdy. Wrong choice. Heavy fabric blocks too much light and makes the shade droop. Plus, in a small bathroom, you want the light to feel airy, not like a heavy curtain.
For a DIYlamp that actually works, stick with lightweight cotton canvas or unbleached muslin. These fabrics diffuse light beautifully and hold their shape when glued. Avoid anything with a dense weave, plastic coating, or metallic threads (those can heat up oddly). Here is a quick checklist for fabric shopping:
- Weight: Look for fabric with a medium drape, not too stiff and not flimsy.
- Color: White, cream, or light pastels give the softest glow.
- Thread count: Lower thread count (around 180 to 200) lets more light pass through.
- Test at home: Hold the fabric up to a desk lamp before you cut. If you can see the bulb silhouette clearly, it is perfect.
I learned this the hard way when my first attempt looked like a Halloween ghost in the bathroom. Save yourself the redo and pick thin cotton canvas first.
Mistake #2: Ignoring Heat and Fire Safety in a Small Bathroom
This one should be obvious, but I almost overlooked it because I was so excited about the design. Fabric around a light bulb can get surprisingly warm, especially in a small enclosed space like a bathroom. I used a standard 60 watt incandescent bulb on my first test and the fabric started smelling hot after 20 minutes. Not good.
The rule is simple: always use LED bulbs only. They run cool to the touch and use way less energy. For a small bathroom, an LED bulb with 400 to 500 lumens gives plenty of light without overheating the shade. I also recommend spacing the fabric at least 2 inches away from the bulb. My design uses three BBQ skewers as a frame, which naturally keeps the canvas a safe distance from the light source. Another tip: skip any glue that is not heat resistant. Silicone glue works well because it can handle the slight warmth without weakening.
Test the lamp before you hang it permanently. Let it run for an hour in a safe spot and feel the fabric. If it is more than slightly warm, move the bulb further away or switch to a lower wattage LED.
Mistake #3: Measuring Wrong for a Small Bathroom Space
I totally misjudged the size of my bathroom when I made my first lamp. I built a shade that was 14 inches wide and it looked like a beach ball dangling in a 4×5 foot room. It overwhelmed everything, including the mirror and the tiny sink.
For budgetdecor to actually enhance a small bathroom, the lamp needs to feel proportional. Measure the ceiling height and the floor area first. In a typical small bathroom (around 40 square feet), a lamp shade with a diameter of 8 to 10 inches works best. The length from the ceiling to the bottom of the shade should not exceed 18 inches, otherwise it will block the mirror or hit your head when you lean over the sink.
Here is my measuring trick: cut a piece of string to the planned lamp length, tape it to the ceiling, and leave it for a day. Walk around the room and see if the string annoys you. If it does, shorten the lamp before you build. That simple test saved me from another oversized disaster.
Mistake #4: Skipping a Diffuser Layer and Getting Harsh Light
My first lamp looked pretty but gave off a harsh spot of light right in the center. The rest of the shade stayed dark. That is not ambient lighting, that is a spotlight. And in a small bathroom, harsh light makes every imperfection on the mirror look worse.
The fix is easy: add a diffuser layer between the bulb and the outer fabric. I used a second piece of thin white muslin wrapped around the skewer frame before attaching the outer canvas. This spreads the light evenly so the whole shade glows softly. You can also use a small paper lantern or a lampshade liner sold at craft stores. Just make sure the inner layer is not glued directly to the bulb. It should float around the bulb with at least half an inch of air gap.
Another option: use a frosted LED bulb instead of clear. That alone softens the beam significantly. Combine a frosted bulb with the muslin liner and you get the kind of warm, gentle light that makes a small bathroom feel like a spa.
Mistake #5: Using the Wrong Glue and Having the Fabric Peel Off
Silicone glue is great, but not all silicones are the same. I bought a cheap tube from a dollar store and my fabric started peeling away from the skewers within a week. The bathroom humidity did not help either.
Look for a silicone adhesive that is labeled waterproof and heat resistant up to at least 150 degrees Fahrenheit. I use GE Silicone II for windows and doors (it is clear and stays flexible). Apply a thin bead to the skewer and press the fabric into place. Hold it with a clothespin or binder clip for 10 minutes while the glue sets. Do not rush this step. I let mine cure for a full 24 hours before hanging and it still holds strong after six months.
If you are worried about the glue smell (some silicones have a strong vinegar odor), let the lamp cure in a well ventilated room for a day or two before moving it into the bathroom. The smell fades completely.
Mistake #6: Forgetting to Plan for Humidity and Moisture
Bathrooms are humid. That is a fact. And fabric does not love humidity. My second lamp started looking limp and saggy after a few steamy showers. The fabric absorbed moisture and stretched, ruining the clean shape.
To counter this, I now treat the canvas with a light spray of fabric waterproofing (the same kind used for outdoor cushions). Let it dry fully before assembling the lamp. Also, make sure the lamp hangs at least 3 feet away from the shower head or bathtub splash zone. If your bathroom is tiny and that is impossible, consider using a synthetic fabric like polyester canvas instead of natural cotton. It resists moisture better.
Another trick: ventilate the bathroom while showering. That is good practice anyway, and it helps the fabric dry out quickly after each use. My lamp has been fine now that I run the exhaust fan for 15 minutes post shower.
Putting It All Together: A Simple Assembly Reminder
If you want to avoid all these mistakes, follow this order. First, choose a lightweight cotton or polyester canvas. Second, measure your bathroom to decide the lamp diameter and drop length. Third, buy a cool running LED bulb and a silicone glue that can handle heat and water. Fourth, build a simple frame using three BBQ skewers arranged in a tripod shape (or a square with four skewers). Fifth, add a diffuser layer of thin white fabric. Sixth, glue the outer canvas onto the skewers and let it cure for 24 hours. Finally, hang the lamp securely from a ceiling hook or a light fixture that can support the weight (which should be under 8 ounces).
This diyproject is genuinely easy, but the small details make the difference between a lamp that looks homemade and one that looks like you bought it from a boutique. I have made four of these now for friends and each one gets better because I remember the lessons from my early fails.
Final Thoughts and a Soft Call to Action
Making your own hanging lamp for a small bathroom does not need to be complicated or expensive. With canvas fabric, BBQ skewers, and silicone glue you can create a soft, ambient light that adds character to your space. Just watch out for the common pitfalls: the wrong fabric, an overheated bulb, poor measurements, no diffuser, weak glue, and humidity damage. Avoid those and you will have a lamp you are proud to show off.
I would love to see how yours turns out. Grab your supplies this weekend and give it a try. Save this idea for your next project and tag a friend who loves bathroomdecor as much as you do.
#DIYlamp #bathroomdecor #homelighting #budgetdecor #diyproject
Leave a Comment