Why Remove Background in Photoshop? The Checkered Pattern Explained
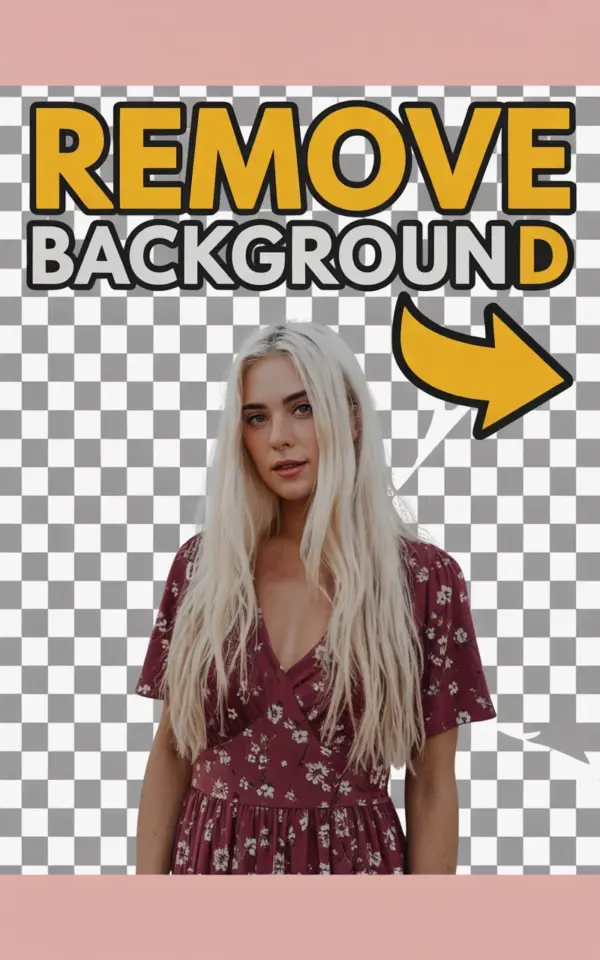
If you have ever seen a Photoshop mockup with a gray and white checkered pattern, you already know what a transparent background looks like. That checkerboard means there is no solid color behind your subject, just empty space. In the tutorial image that inspired this post, you see a large yellow “REMOVE” text with a black outline, followed by “BACKGROUN” in white and a yellow “D,” plus a bright yellow arrow pointing to the right. That arrow is basically saying “cut here.” Learning to remove background in Photoshop opens up endless possibilities for product photos, portraits, and digital art. And you do not need an expensive subscription or fancy plugins to get clean results.
I have been editing photos on a tight budget for years. I learned that the free tools inside Photoshop itself can do 90% of what expensive third party software promises. This tutorial focuses on real steps that work for anyone with a basic Photoshop plan. We will use the subject from the image: a person with long platinum blonde hair wearing a burgundy floral dress with small white flowers. That dress and hair are tricky, but totally doable.
Budget Friendly Tools for Removing Background in Photoshop
Photoshop offers several built in tools that cost nothing extra beyond your subscription. The Quick Selection tool works fast for solid backgrounds. The Magic Wand works well for high contrast edges. For complex subjects like wispy hair or patterned fabric, the Refine Edge Brush (or Select and Mask) is your best friend. I never buy premium background removal plugins. I stick to these default options and adjust my technique instead.
If you are on a strict budget, you can even use the free trial of Photoshop to practice. But for regular use, the Photography plan (about $10/month) gives you Photoshop and Lightroom. That is less than a pizza delivery for two, and it pays for itself after one professional looking photo edit.
- Quick Selection Tool – good for large, solid areas. Paint over the background and it selects similar pixels.
- Magic Wand – click on a single color to select all connected pixels of that shade. Great when the background is one flat color.
- Pen Tool – precise but slower. Best for sharp edges on objects like glasses or metal.
- Select and Mask – the most powerful free option for hair, fur, and fine details.
Step by Step: Cut Out a Person in a Floral Dress
Let me walk you through removing the background from that woman with the platinum blonde hair and burgundy floral dress. I will use the Quick Selection tool first, then refine the edges. The key is to work in layers so you can always go back.
Step 1: Open your image in Photoshop and duplicate the layer. This preserves the original in case you mess up. Then press Ctrl+J (Cmd+J on Mac) to create a copy.
Step 2: Select the Quick Selection tool from the toolbar (looks like a paintbrush with a dotted circle). Adjust the brush size using the bracket keys [ or ]. Start painting inside the subject, avoiding the background. For the floral dress, the pattern might confuse the tool, so take it slow. Focus on the solid areas like skin or the darker parts of the dress first.
Step 3: Hold the Alt key (Option on Mac) and paint over any background that got included accidentally. With the platinum blonde hair, light strands can blend into a light background. That is normal. Do not worry yet about perfect edges.
Step 4: Once you have a rough selection, click the “Select and Mask” button in the top toolbar (or go to Select > Select and Mask). This opens a dedicated workspace with edge detection controls.
Step 5: Use the Refine Edge Brush tool (the brush with a feather icon) along the hair and the edges of the floral dress. Paint over the problem areas. Photoshop will analyze the contrast and try to separate the subject from the background. This works especially well when the background is a solid color and the subject has texture.
Step 6: Check the output settings. Choose “Layer Mask” so the background becomes transparent but the original layer remains intact. Click OK.
Step 7: Now you should see the checkered pattern behind your subject. That confirms the background is removed. For the image in this tutorial, the yellow arrow and the bold text appear on that checkered pattern, showing exactly what your final result should look like.
Refining Edges for a Natural Look
Hard edges ruin an otherwise perfect cutout. If your subject has soft hair or a flowing dress, you need to soften those edges gently. In the Select and Mask workspace, look for the “Global Refinements” sliders. Increase the “Smooth” slider a tiny bit (1-3 pixels) to reduce jaggedness. Then add a small amount of “Feather” (0.5 to 1 pixel) to mimic natural blur along the edges. Do not overdo it, or you will lose detail.
For the platinum blonde hair, I recommend using the “Decontaminate Colors” option. This removes any faint halo of the original background color that sticks to the hair strands. It creates a much cleaner cutout. Just remember that this option permanently alters the pixels, so apply it only on a duplicate layer.
- Smooth: 2-3 pixels for most subjects, less for sharp edges.
- Feather: 0.5-1 pixel for realism.
- Contrast: Increase slightly if your subject has clear edges but you want to sharpen them.
- Shift Edge: Move inward by 1-2 pixels if you see a background fringe.
Common Mistakes and How to Fix Them on a Budget
New users often lose fine details like fingers or flower petals. If your selection eats into the subject, undo that step and switch to a smaller brush. Another common error is leaving a white or colored halo around the edges. You can fix that without buying any plugin by going to Layer > Matting > Defringe. Enter a radius of 1-3 pixels. Photoshop will replace the fringe colors with nearby subject colors.
If your budget does not include a graphics tablet, do not worry. A mouse works fine for most selections. Just zoom in (Ctrl++) and take your time. I have cut out hundreds of subjects with a cheap mouse. The trick is patience and using keyboard shortcuts like Alt to subtract and Shift to add to selections.
For the floral dress pattern, small flowers might get misselected. When that happens, use the Lasso tool (with a feather of 1-2 pixels) to manually clean up the edges. It is slower but absolutely free.
Saving Your Transparent Background for Web and Print
Once you have removed the background and see that checkered pattern, you need to save correctly. If you save as JPEG, the checkered pattern disappears and a solid white (or black) background appears. Always save as PNG to preserve transparency. For the tutorial image, the yellow arrow and text are overlaid on the checkered pattern in the mockup, but in your final file you want only the subject. Do not save the checkerboard itself. That is just a visual cue.
For print, save as TIFF with transparency. For web, PNG is standard. If you need a smaller file size, consider a transparent GIF but it only supports 256 colors. For the vibrant burgundy floral dress, PNG is better to keep all the subtle tones.
If your final image looks like the mockup (subject on a checkered background), you can simply hide the checkered pattern by clicking the little checkerboard icon in the layers panel. That way you only see the subject on transparent. Then export as PNG.
Final Thoughts on Removing Background in Photoshop
Removing a background does not have to be expensive or frustrating. With the tools already in Photoshop, you can achieve professional results even on a tight budget. The checkered pattern is your friend: it tells you when you have succeeded. The yellow arrow in the tutorial image points forward, and that is exactly the direction you are going. Practice on your own photos, maybe a friend in a floral dress with bright hair, and you will get faster with each attempt.
If you found this guide helpful, save this pin for later. That way you can come back to these step by step instructions whenever you need to cut out a subject. And if you want more Photoshop tips that do not break the bank, keep exploring. There is always a practical way to get the job done without spending extra.
#RemoveBackground #PhotoshopTutorial #PhotoEditing #BackgroundRemoval #PhotoshopTips
Leave a Comment